

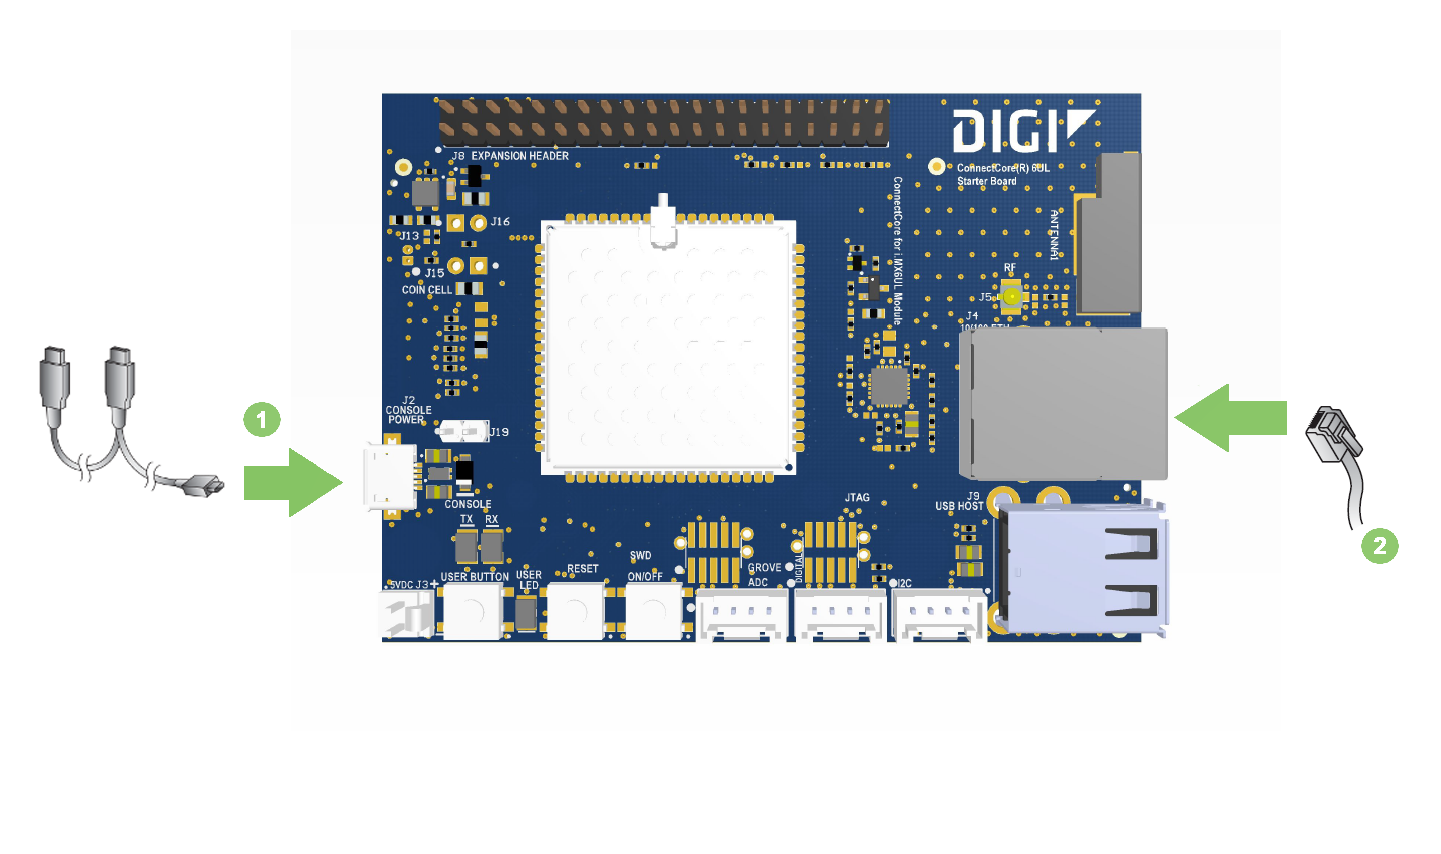
Follow these steps to set up your ConnectCore 6UL SBC Express hardware:
-
Connect the Micro-USB Y-cable to the CONSOLE connector on the board and to your host computer. The operating system will detect the board as a new serial port. Identify the new serial port on your operating system (/dev/ttyUSBx in Linux, COMx in Windows), as you will need to open a console at that port in the following step.
-
Connect the Ethernet cable (not included) to the Ethernet port.
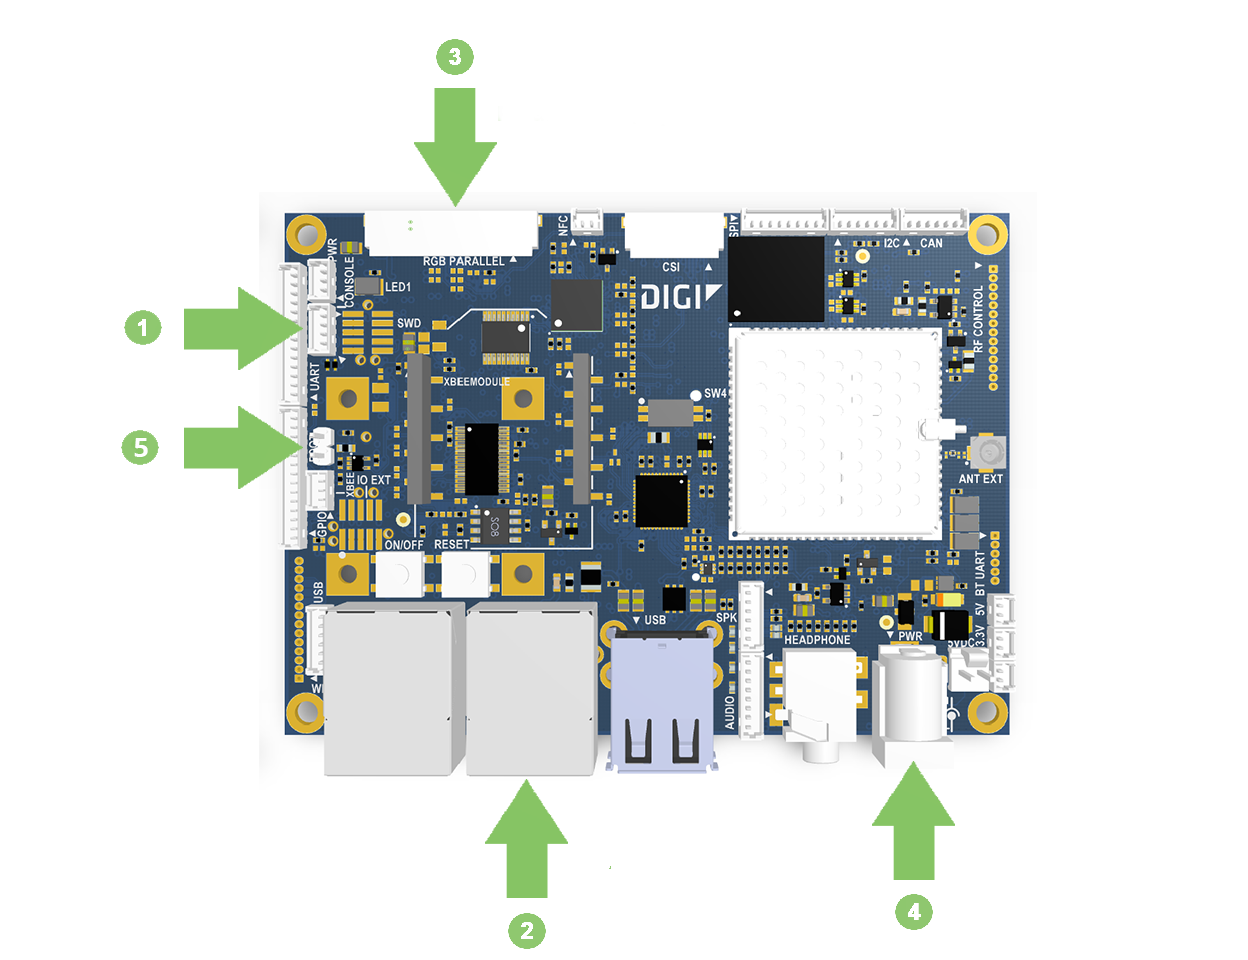
Follow these steps to set up your ConnectCore 6UL SBC Pro hardware:
-
Connect the USB serial cable to the CONSOLE connector on the board and to your host computer. The operating system will detect the board as a new serial port. Identify the new serial port on your operating system (/dev/ttyUSBx in Linux, COMx in Windows), as you will need to open a console at that port in the following step.
If the operating system does not recognize your board you must manually install the drivers, which are available on the Prolific website. -
Connect the Ethernet cable (not included) to ENET1 Ethernet port (beside the USB connector).
-
(Optional) Connect the AUO 10.1" LVDS LCD display (not included, Digi P/N CC-ACC-LCDH-10) to the LVDS connector on the bottom side of the board. You can purchase the LCD Application Kit from Digi. Make sure the metal pads on the parallel connector are facing up.
-
Connect the power supply to the power barrel connector.
-
Make sure the BOOT jumper is open.
